


Student emergency reunification is a built-in feature to the Pikmykid Dismissal platform.
At Pikmykid, we know how important it is to stay prepared for safety incidents big and small. Our reunification feature only takes a few minutes to set up and should be a priority at your campus. We have outlined the steps below so you can check this off your list and feel prepared.
If you’d like to skip to text only instructions click here.


Additional Notes
- When reunification is active parents will not be able to use their app to make pick up mode changes or schedule early dismissals.
- Pikmykid recommends after initial testing to set aside some time with your staff so everyone feel comfortable in the functions and assigned roles for reunification.
- Pikmykid recommends including the reunification features as part of your usual safety drills.
- All staff should be familiar with how to use the features in case an administrator or safety personnel is not able to fulfill their duties during an emergency.
- Please ask your staff to update their mobile numbers in their Pikmykid profile in the upper right of the portal. This will help with communication alerts during an emergency.
Create your Plan
1. Login to your Pikmykid School Portal on any web browser
2. Choose the settings wheel in the upper right corner and click “Emergency”
3. Choose the “Reunification” tab
4. Click “Add New Plan”
5. Add your Title (Ex: Coolest Elementary Reunification)
6. Name your parent check in area (Ex: East Parking Lot or Community Center Lobby)
7. This is where you plan to allow parents to check in with a staff member. According to guidelines this should be separated from the student holding area for security & extra safety precautions.
8. Add up to 3 student holding areas (Ex: Cafeteria or Community Center Gym)
9. This is where you plan to have staff monitor the children in groups while they wait on their parent for pick up. According to guidelines this should be separated from the parent check in area for security & extra safety precautions.
10. Name your reunification area (Ex: Front Office or Community Center Lot A)
11. This is where you plan to reunite students with their parents for pick up after they have checked in with confirmed identification. According to guidelines this should be separated from the student holding area for security & extra safety precautions.
12. Click “Create Plan”
Test/Use your Reunification Features
1. Click the red “Report Emergency” button in the lower left of your school portal
2. Your reunification plan will be selected and show the various areas as a reminder. You will have an opportunity to include a staff notification message. I recommend including that this is a drill if it applies so when staff receive their alert they do not panic.
3. The next screen will give you the option to send an alert to parents. If you choose to send an alert to parents at this time you will be able to edit & add further messaging. Please be advised you do NOT have to alert parents and can leave the toggle off. You can always use the Pikmykid Messenger feature to send parents an alert or additional alerts at a different time.
4. Click “Start Reunification” and a pop up will appear confirming that reunification has been initiated
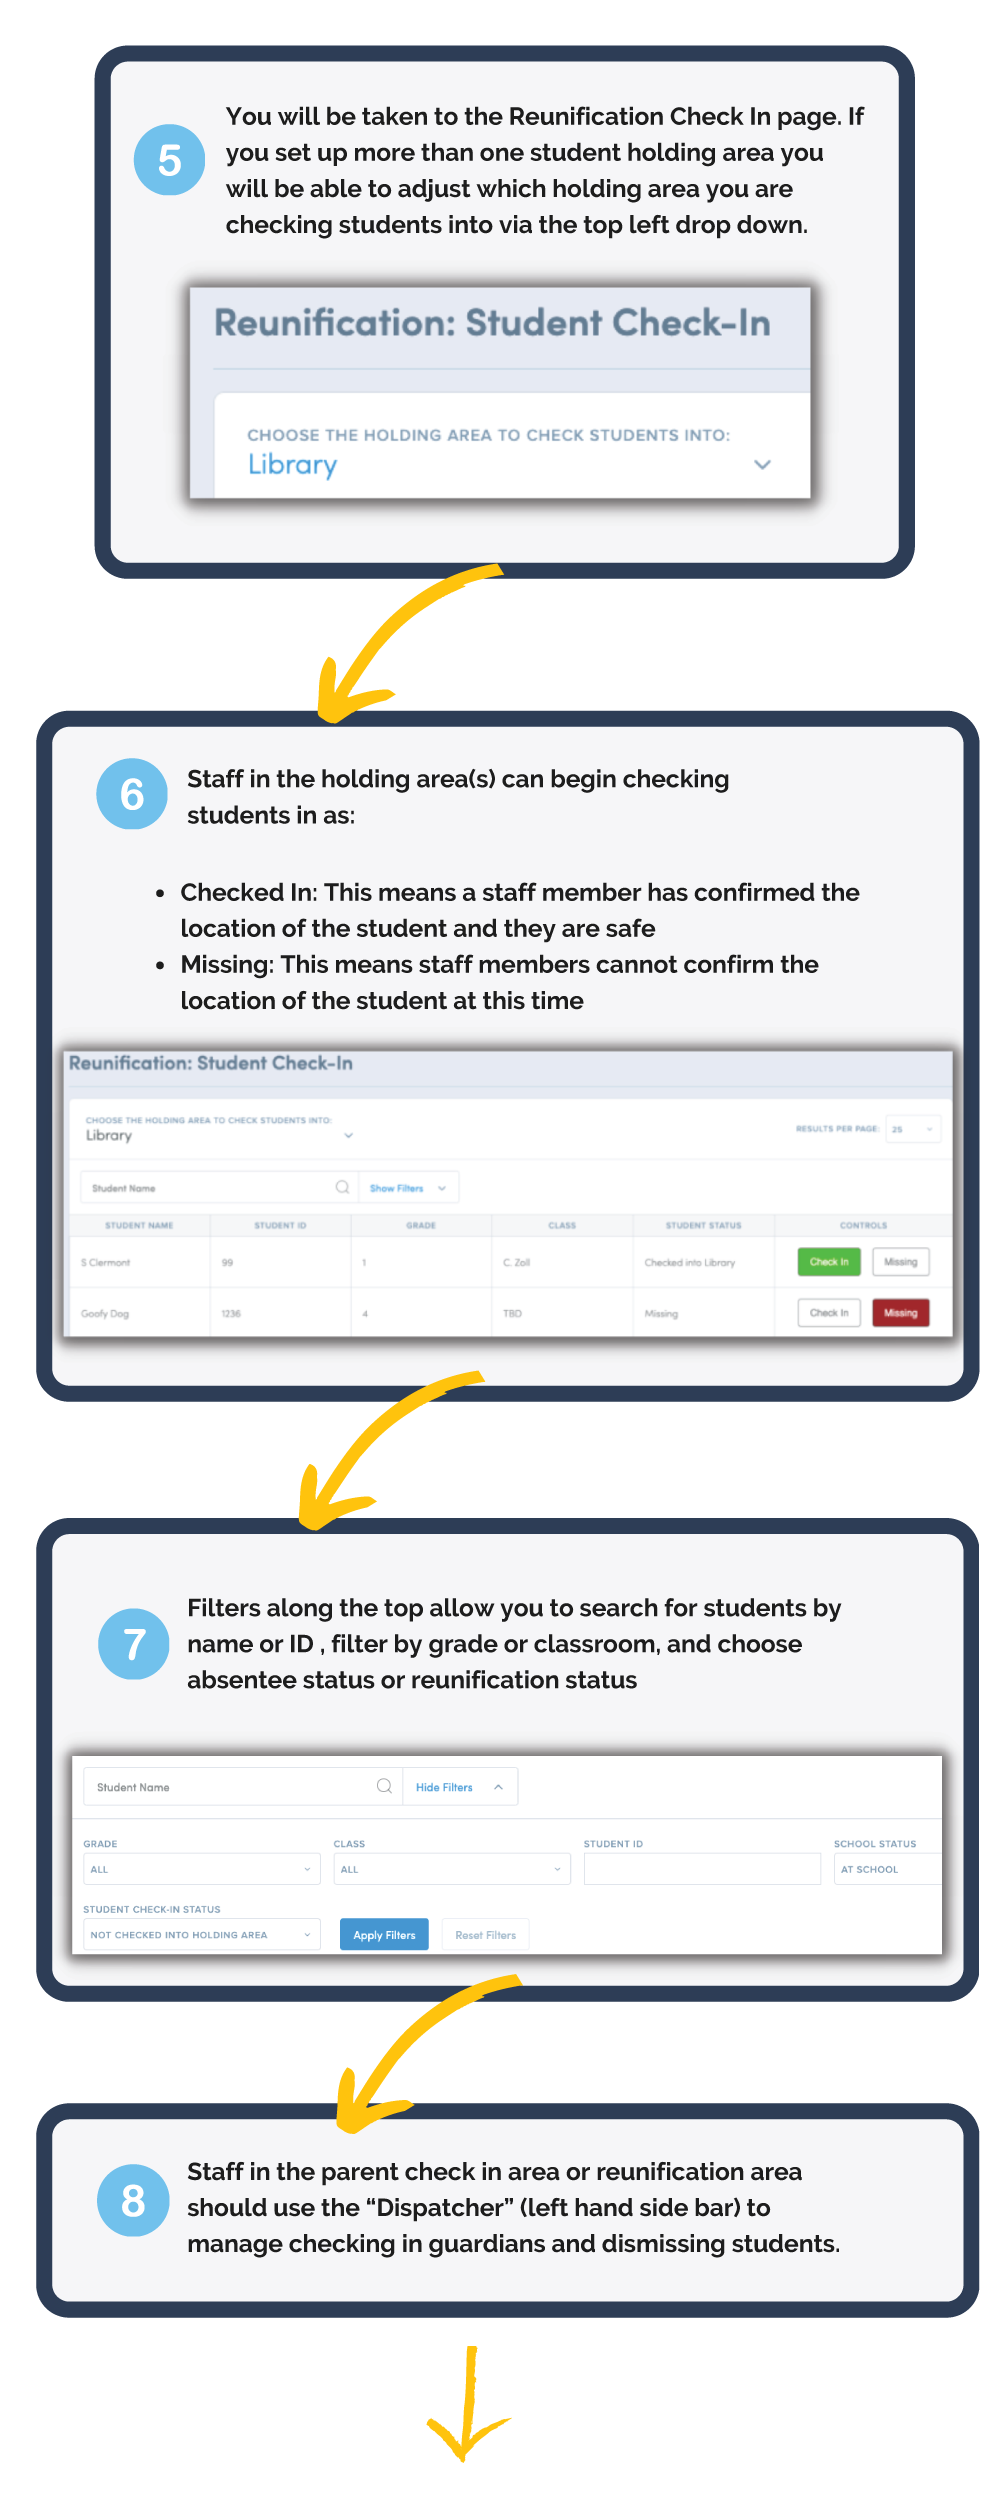
5. You will be taken to the Reunification Check In page. If you set up more than one student holding area you will be able to adjust which holding area you are checking students into via the top left drop down.
6. Staff in the holding area(s) can begin checking students in as:
- Checked In: This means a staff member has confirmed the location of the student and they are safe
- Missing: This means staff members cannot confirm the location of the student at this time
7. A student’s status of “Missing” can be corrected to “Checked In” once the student is located
8. Filters along the top allow you to search for students by name or ID , filter by grade or classroom, and choose absentee status or reunification status
9. Staff in the parent check in area or reunification area should use the “Dispatcher” (left hand side bar) to manage checking in guardians and dismissing students.
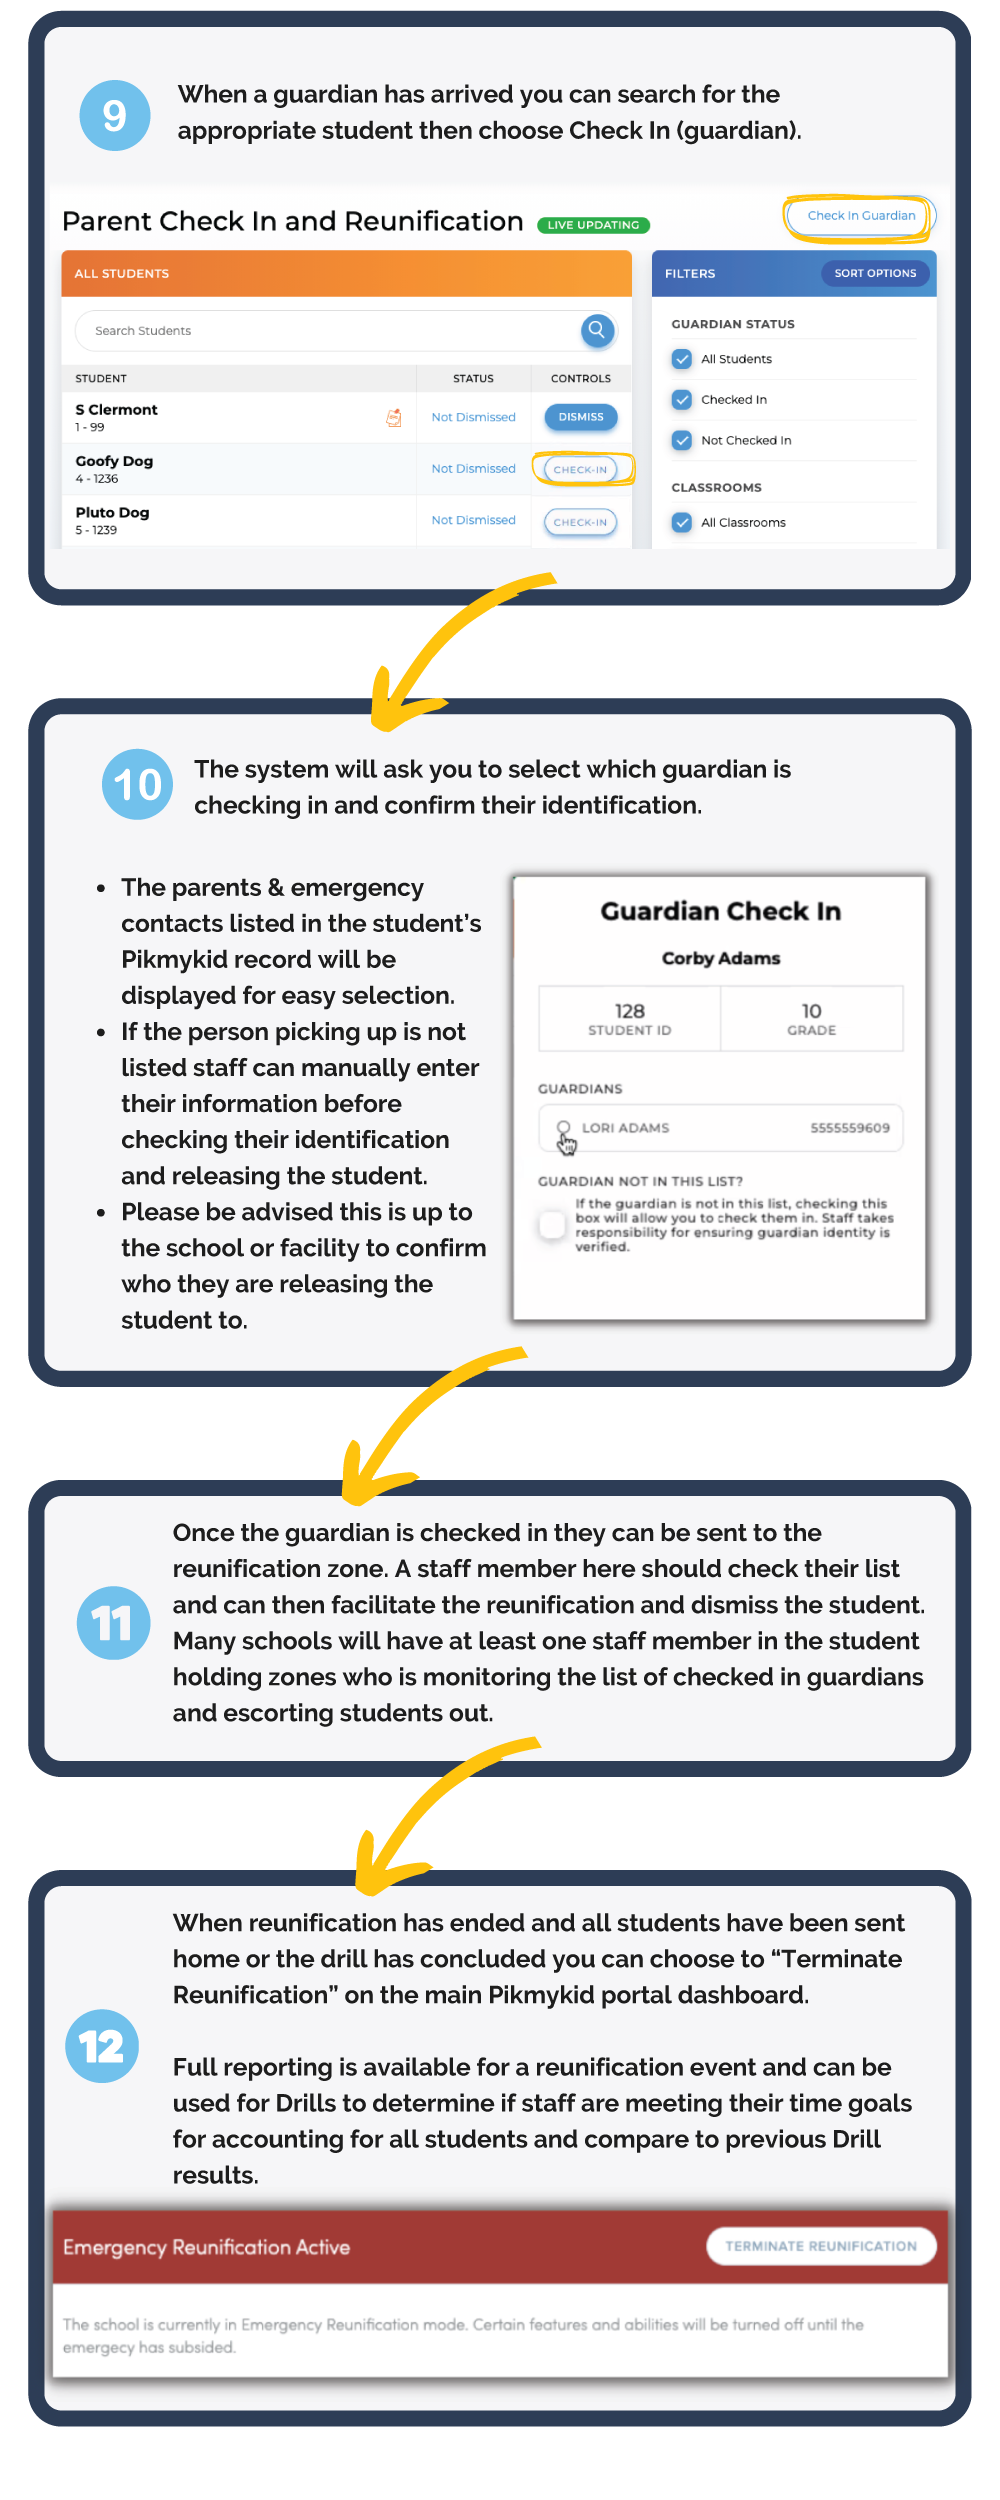
10. When a guardian has arrived you can search for the appropriate student then choose Check In (guardian).
11. The system will ask you to select which guardian is checking in and confirm their identification. The parents listed in the student’s Pikmykid record will be displayed for easy selection. If the person picking up is not listed staff can manually enter their information before checking their identification and releasing the student. Please be advised this is up to the school or facility to confirm who they are releasing the student to.
12. Once the guardian is checked in they can be sent to the reunification zone. A staff member here should check their list and can then facilitate the reunification and dismiss the student. Many schools will have at least one staff member in the student holding zones who is monitoring the list of checked in guardians and escorting students out.
13. When reunification has ended and all students have been sent home or the drill has concluded you can choose to “Terminate Reunification” on the main Pikmykid portal dashboard.
14. Full reporting is available for a reunification event and can be used for Drills to determine if staff are meeting their time goals for accounting for all students and compare to previous Drill results.