
Download PDF
Click here to download a PDF with this information.
Setting Up Digital Hall Pass
Staff with administrative access in the portal will begin by configuring the settings and parameters for Hall Pass usage.
Hall Pass Settings
Staff Notifications
Informs staff of Hall Pass activity. When enabled, staff will receive an email notification, and if they have the Pikmykid Staff app, they will also receive a push notification.
Destination Capacity Limit
Allows you to determine how many passes can be active to a location at one time.
Daily Destination Limit
Refers to how many passes can be created to each room within one day.
Student Daily Limit
Determines the number of passes students have access to throughout the school day.
Hallway Capacity
Allows you to determine how many students on a hall pass can be moving about the hallways at one time.
Student Restriction Groups
Can be created to limit problematic behavior by preventing specific students from leaving the class at the same time.
Auto-Complete
When an expired pass is left incomplete, the system will complete the hall pass automatically after the set time limit.
With each capacity limit or restriction, staff have the ability to override the limits when necessary (optional setting based on school determination).

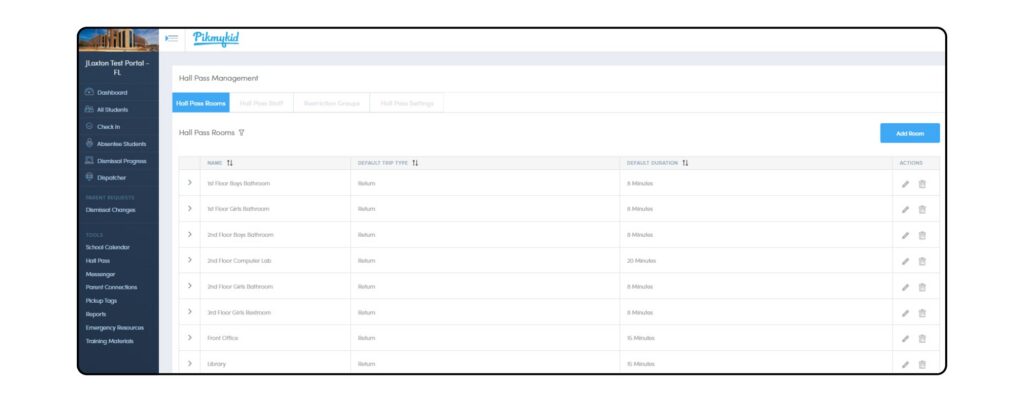
Hall Pass Rooms
Here you can set up which rooms or Hall Pass destinations are available such as campus restrooms, the clinic, front office, or media center.
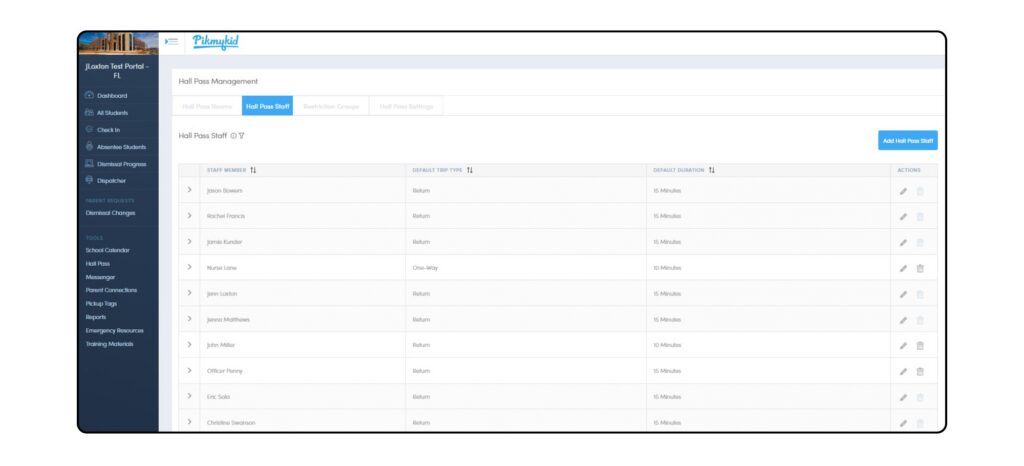
Hall Pass Staff
Staff that are listed here will be able to access the Hall Pass feature from the school portal. They will also be listed as destination options when creating passes.
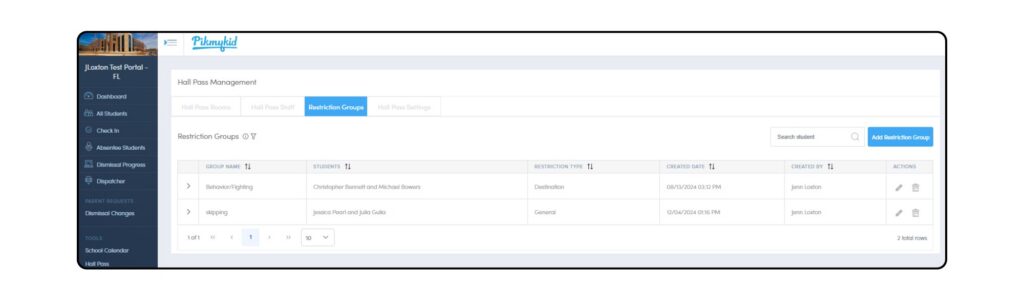
Restriction Groups
Staff can create and manage student restriction groups from this page; restriction groups can be added or deleted at any time throughout the school year.
How To Use Digital Hall Pass
All school users will login to schools.pikmykid.com to access the school portal. From there, staff will navigate to the Hall Pass tab on the blue left side bar on the dashboard. A quick snapshot of Hall Pass activity can also be viewed from the portal dashboard.
Hall Pass information, including timestamped data, is available to view in the school portal under Reports.
Teacher-Created Passes
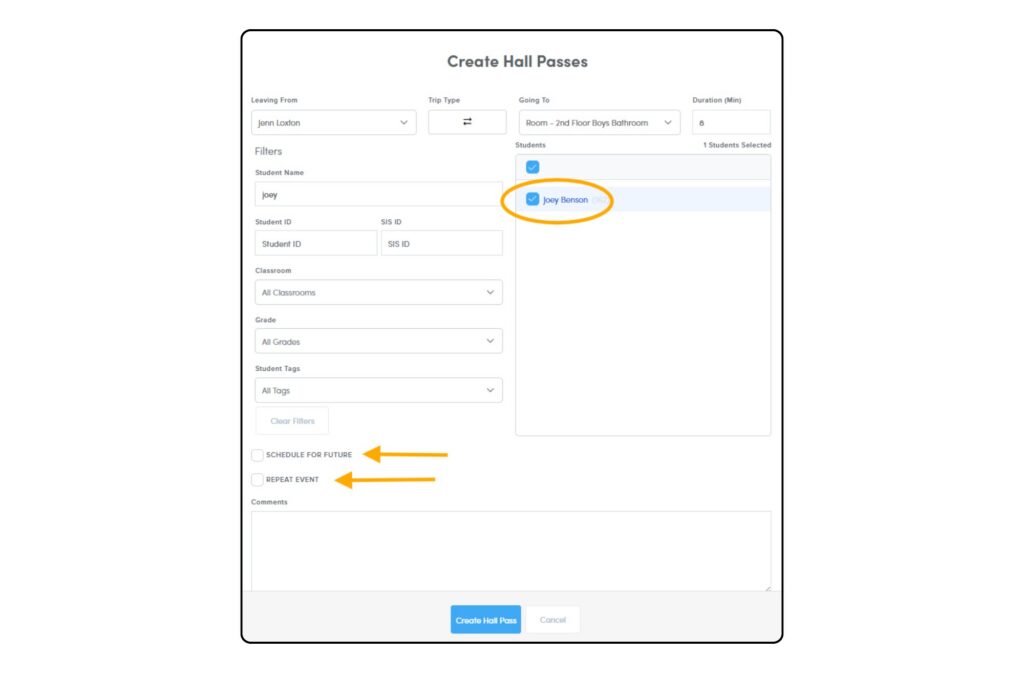
Click the Hall Pass tab on the blue left side bar, then click Create Hall Pass. Select where the student is leaving from and going to and click Create Hall Pass. On the following screen:
- The default Trip Type & Duration will appear and can be edited.
- Search for a student name or filter by grade or classroom.
- Select a student’s name by checking the box next to their name. You can even create a pass for multiple students at once!
- Click Create Pass – the pass is now Active for the student.
- Teachers can also schedule passes for the future or create repeating passes for students who need to leave the classroom on a frequent basis.
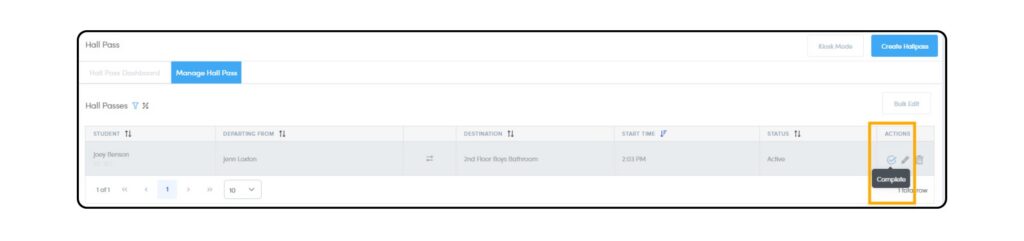
Managing Hall Passes
From the Hall Pass dashboard, staff members can view & manage all hall passes or sort passes using a variety of filters. Once a student’s trip is complete, staff should click the check mark to complete the pass, creating a timestamp of when the student returned.