

Download PDF
Click here to download a PDF with this information.
Settings
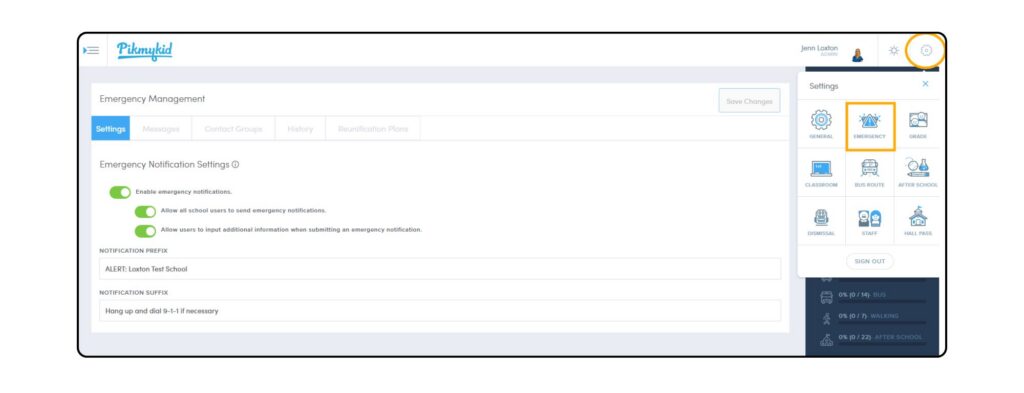
To set up the Emergency Alert System, go to the Settings Wheel > Emergency.
- Enable Emergency Notifications This will turn on the system and allow for notification to be sent to staff.
- Allow All Users To Send Emergency Notifications Gives all school users the ability to report an emergency (within each emergency message, administrators are able to specify which emergency messages can only be sent by portal admin).
- Allow Users To Input Additional Information When Submitting An Emergency Notification This allows users to edit or add information to messages before sending out the alert.
- Notification Prefix A brief phrase that will be included at the beginning of each message; if you have faculty that travel to multiple campuses within the district, having the name of the school in the prefix may be beneficial (e.g. ALERT: Main Street School).
- Notification Suffix A brief phrase that will be included at the end of each message (e.g. Hang up and dial 9-1-1 if necessary).
Messages
Prior to being able to send out emergency notifications, the emergency messages will need to be configured. In your portal, you will see some standard messages that you can edit and customize to meet your schools’ safety protocols. To do so, select the pencil icon and edit accordingly. You can also select the trash can icon to remove a message that may not be relevant to your campus.
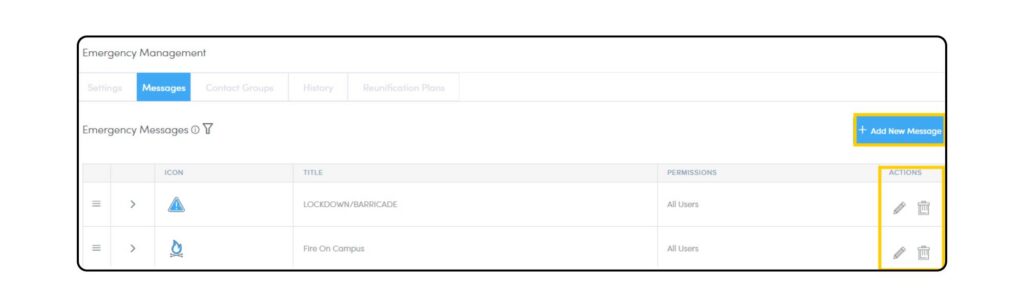
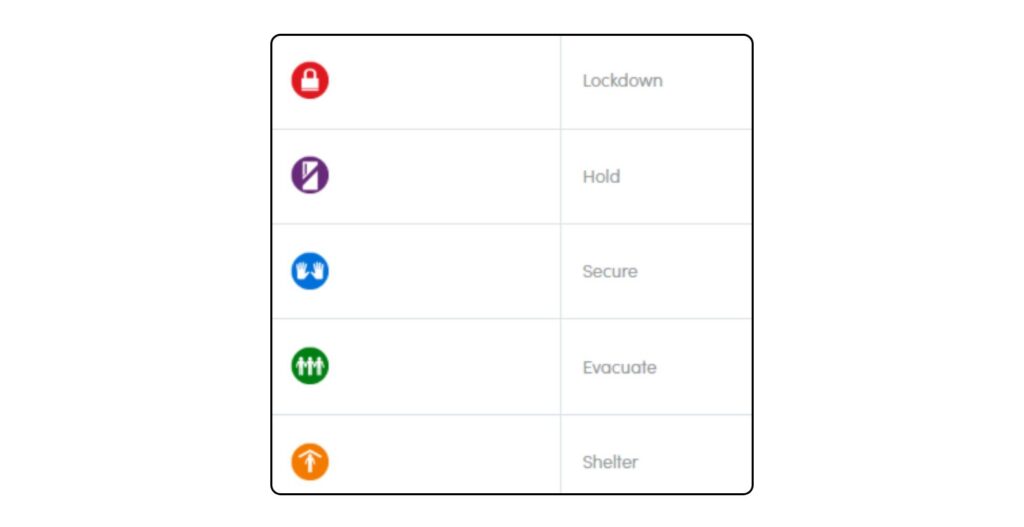
The standard messages also include the Standard Response Protocol icons and verbiage recommended by our mission partners, the ‘I Love U Guys’ Foundation, for your use.
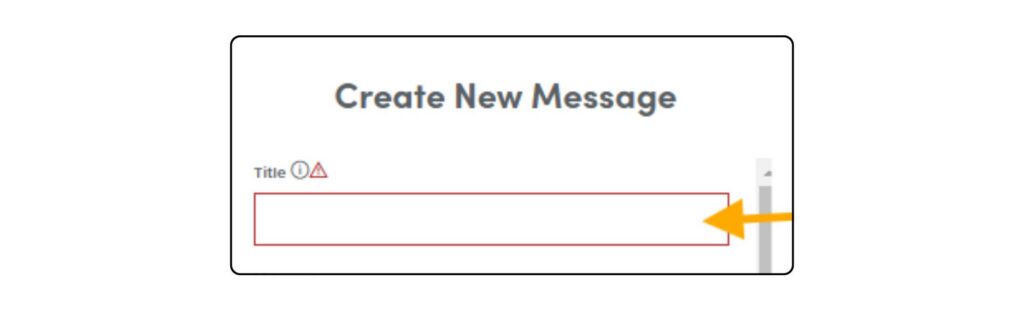
Custom messages can also be created using the Add New Message button.
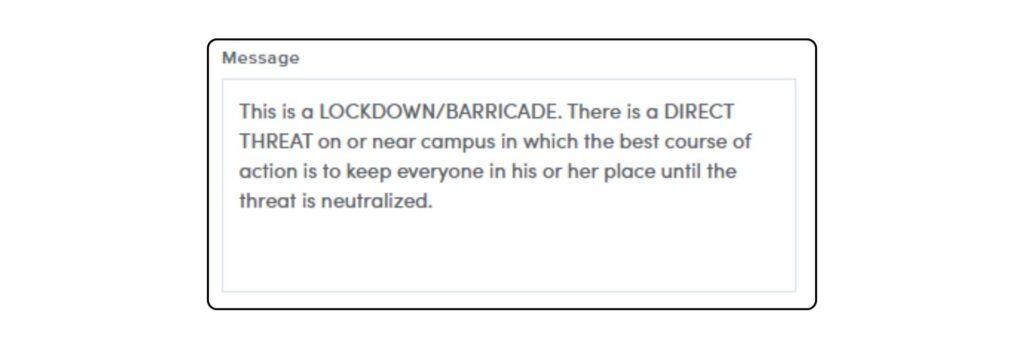
- Title Create a title related to the emergency for each new message (e.g. Lockdown, Fire, etc).
- Message This briefly describes the type of emergency that is occurring and aligns with your schools’ safety protocol.
- Chat Enabled When toggled on, staff will receive a link that will allow them to safely and securely communicate information during an emergency event.

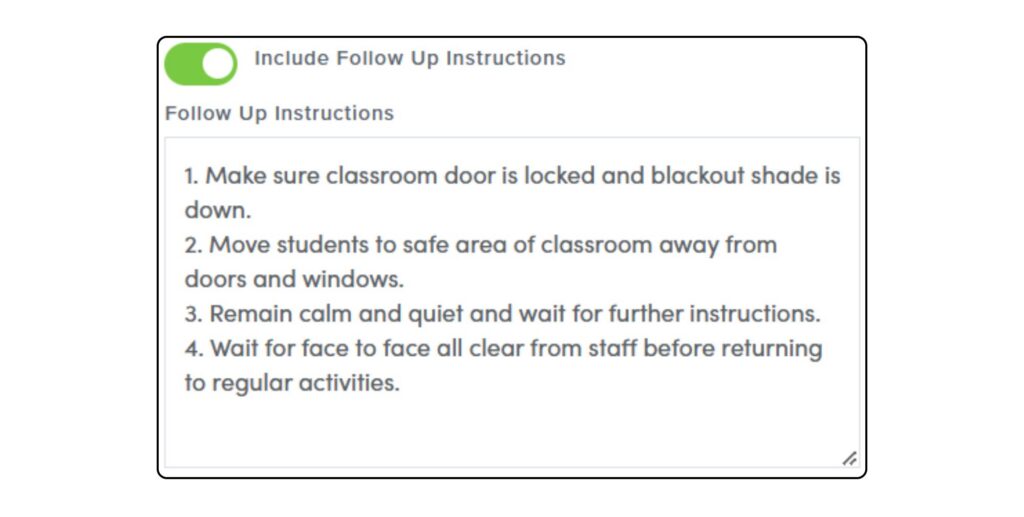
- Include Follow Up Instructions Turning this on will allow you to add follow up instructions with an emergency message. These follow up instructions typically include instructions as to what staff should do during the emergency event.
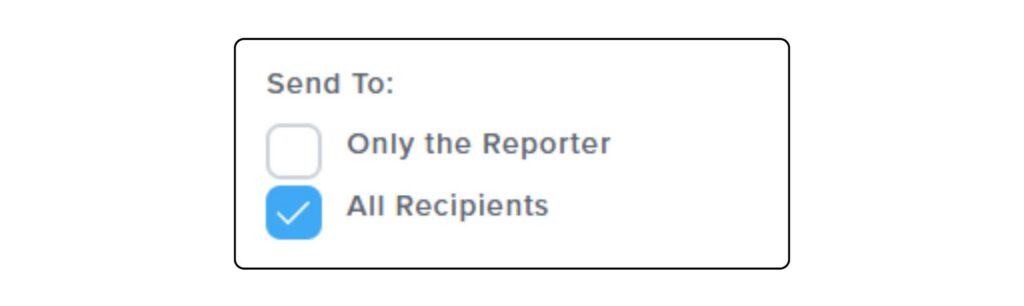
- Send To Here you can determine if you want the follow up instructions to go to Only The Reporter or All Recipients.
- Only Admins Can Send Message Determine if this message should only be initiated by an Administrative User (e.g. Fire Drills) or if any staff could send out the emergency alert (e.g. Playground Injury).

- Recipients Here you will determine who should receive this emergency alert. By default, all faculty listed within the portal as STAFF, will automatically be listed under the recipient group Teachers. Please see Contact Groups for directions on how to add additional faculty and contacts to the emergency messages.
- * Best Practices: At the start of a new school year, staff logging into the portal should confirm their contact information by selecting their name on the top of the right of the portal dashboard. Here they can make updates to their phone number for emergency notifications. Review our Emergency Alert Staff Guide for more information.

Contact Groups
Contact Groups are additional faculty or contacts that can be included for certain emergency messages. These additional contacts are not necessarily someone that is logging into the school portal, but rather contacts who may be on your campus or may need to be notified in certain situations. (For example: Substitute Teachers, Custodial Staff, District Personnel, Medical Professionals, etc).
History
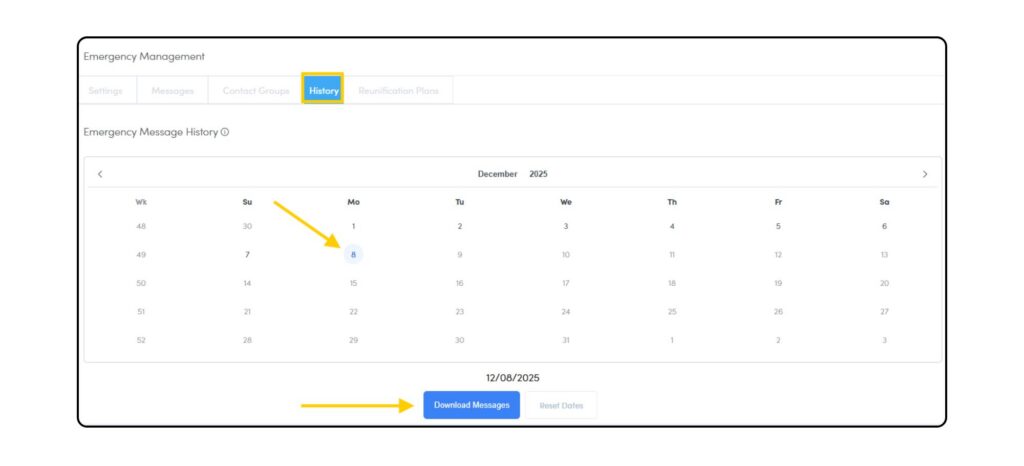
Admin users are able to download a report that shows the history of emergency alerts notifications recipients. This report will download into a CSV file for easier sorting.
* Best Practice: After conducting a drill, the school admin should review a history report to ensure all recipients received the notifications as intended. Staff/Teacher contacts will receive the notifications by text, phone call, email and if they have the Staff App, by push notification. Additional contacts added in Contact Groups will receive a phone call and text notification.
Interested in connecting your local authorities to your emergency notifications? Contact our team at [email protected] for new information.
Emergency Alert System Best Practices
We recommend the following best practices for the Emergency Alert System. This comprehensive approach will support administrators and school staff in building confidence and proficiency in its use.
- Initiate Admin Only Drills– These drills help test communication and allow the admin team to practice the emergency notification process.
-
- Create an Admin Only Contact Group
- Create an Admin Only Test message (select only the Admin Only Contact Group as the recipient)
- Conduct a Drill – Perform these drills regularly to build accuracy and confidence
- Training Materials:
- Conduct an Initial All Staff Drill – This drill ensures staff are familiar with the processes and expectations when an alert is initiated and received.
- Review internal processes and procedures with staff
- Run a History Report (Settings Wheel > Emergency > History) following the drill to ensure successful delivery of all intended messages.
- Repeat this process at the start of each school year during staff professional development week.
- Training Materials:
- Use the EAS System for All Monthly Drills– Regular, repeated practice with the system helps ensure that all staff feel confident and prepared to use it effectively during a real emergency.
- Plan a schedule for holding monthly drills & share your schedule with our team ([email protected]) so we can provide support as needed.
- Use these exercises to improve your workflows and procedures.
- Run a History Report (Settings Wheel > Emergency > History) following the drill to ensure successful delivery of all intended messages.
- Download or print reports (Reports > Emergency Notifications) as needed, for timestamped records of drill activity.