Download PDF
Click here to download a PDF with this information.
Managing Visitor Check-Ins
This guide is designed to assist Front Office Staff in understanding the procedures for managing visitors arriving and departing from campus.
Visitor Check-In/Out Using The Kiosk
Kiosk mode is designed for self-service, allowing visitors to easily manage their check-ins. The most accurate & recommended method for collecting visitor information is so have visitors check-in by scanning their driver’s license at the desk.
Before using the kiosk, ensure the iPads & hardware are connected.
Review the Hardware Guide if needed.
To Sign-In, visitors will:
- Select the Visitor Check-In Button.
- Visitors will then be prompted to scan the back of their government issued driver’s license.
- After that, visitors will have their photo taken.
- Visitors will then select a check-in reason or host.
- Once the visitor information is confirmed, their badge will print.

Upon Check-Out, visitors will:
- Select the Visitor Check-Out Button.
- They will then be prompted to scan the QR code from their badge – this will deactivate the badge & timestamp their departure.
- Visitor badges should then be discarded.
Manual Check-In By Staff
At times, school staff may need to manually check a visitor in or out. It is recommended that all visitors present a valid form of identification that includes their name, date of birth, and address.
Once the visitor presents their ID, use the search bar to locate the visitor’s profile. Once in the visitor’s profile, select Check In.
If a visitor has not been signed in before, their profile will not be located in the system and a profile will need to be created.
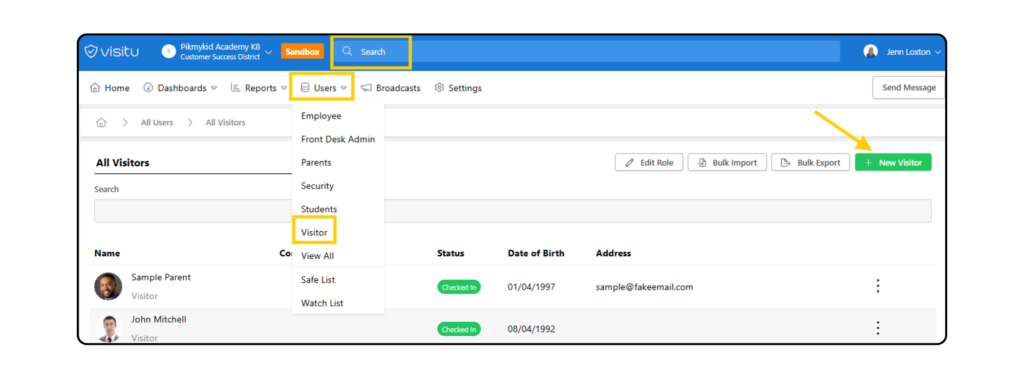
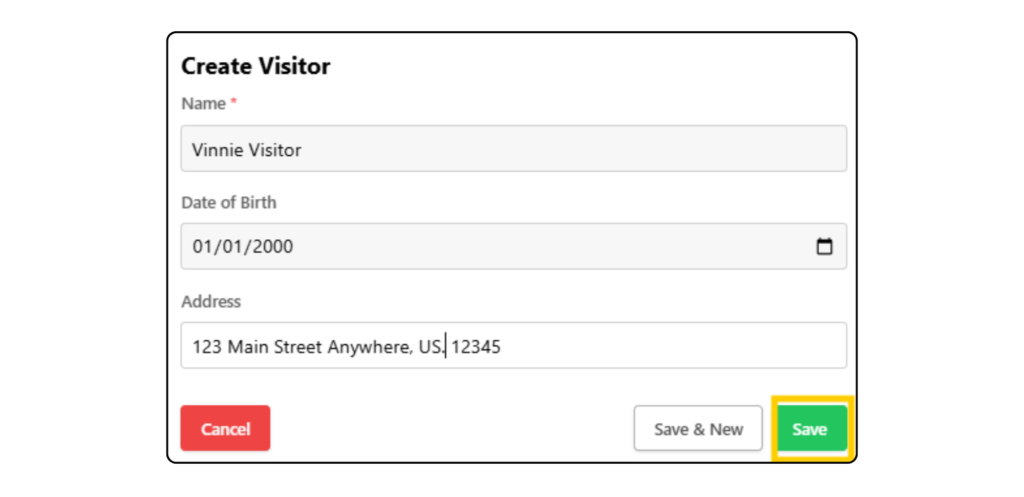
To create a visitor profile, click on Users > Visitor > + New Visitor. Using information form the visitor’s ID, add their name, date of birth and address. Then click Save.
In the visitor’s profile, click Check-In, choose the reason or host, select print badge and select the badge printer. Then click Check-In.
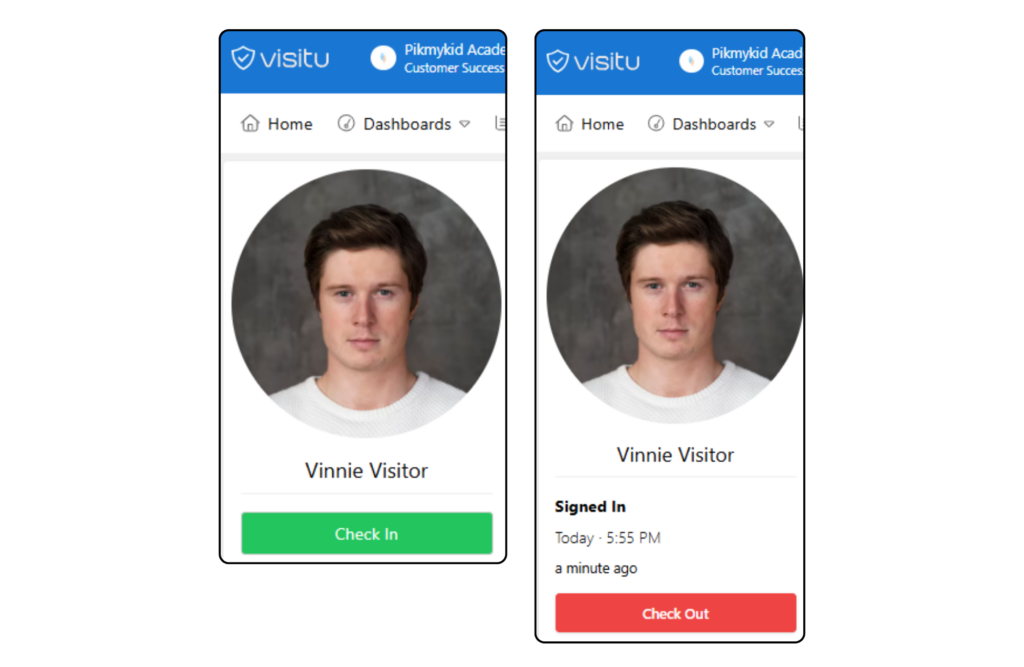
To manually check-out a visitor, go to the visitor’s profile by clicking on the three dots associated with the visitor from the Visitors On Campus dashboard and select Check-Out.
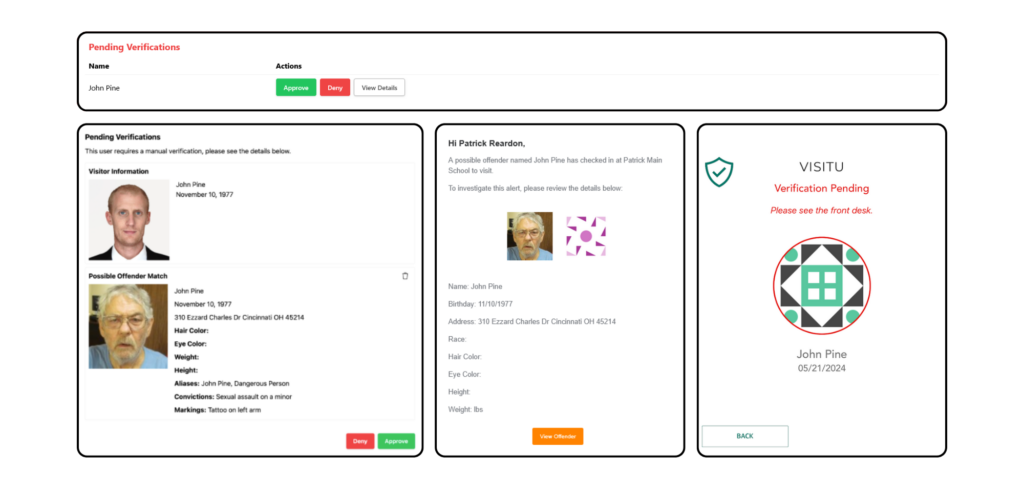
Offender Check
The Offender Check feature enhances campus security by enabling the matching of names & dates of birth against the National Sex Offender Public Registry (NSOPR) database. Scanning the back of a visitor’s driver’s license in the kiosk is the most accurate way to capture visitor information and is the recommended method.
If a possible match is made, visitors signing into the kiosk will receive a Verification Pending notification and be prompted to check in at the front desk. At the same time, front office staff monitoring the portal will receive a pop-up alert about the pending verification. An email will also be sent to Super Admin, Front Office Staff and any other designated employees who should be alerted about the pending verification.
If a visitor is approved, the visitor will be moved to the Safe List and the verification process will NOT be triggered the next time they sign in. If a visitor is denied, the verification will be triggered if they sign in again.
If a visitor is denied access to the campus, their status will still show as Checked-In as a Visitor on Campus. This is to document that they are currently on the school grounds and once they have been escorted off your campus, front office staff should Check Out the visitor to timestamp their removal from the campus.