
Download PDF
Click here to download a PDF with this information.
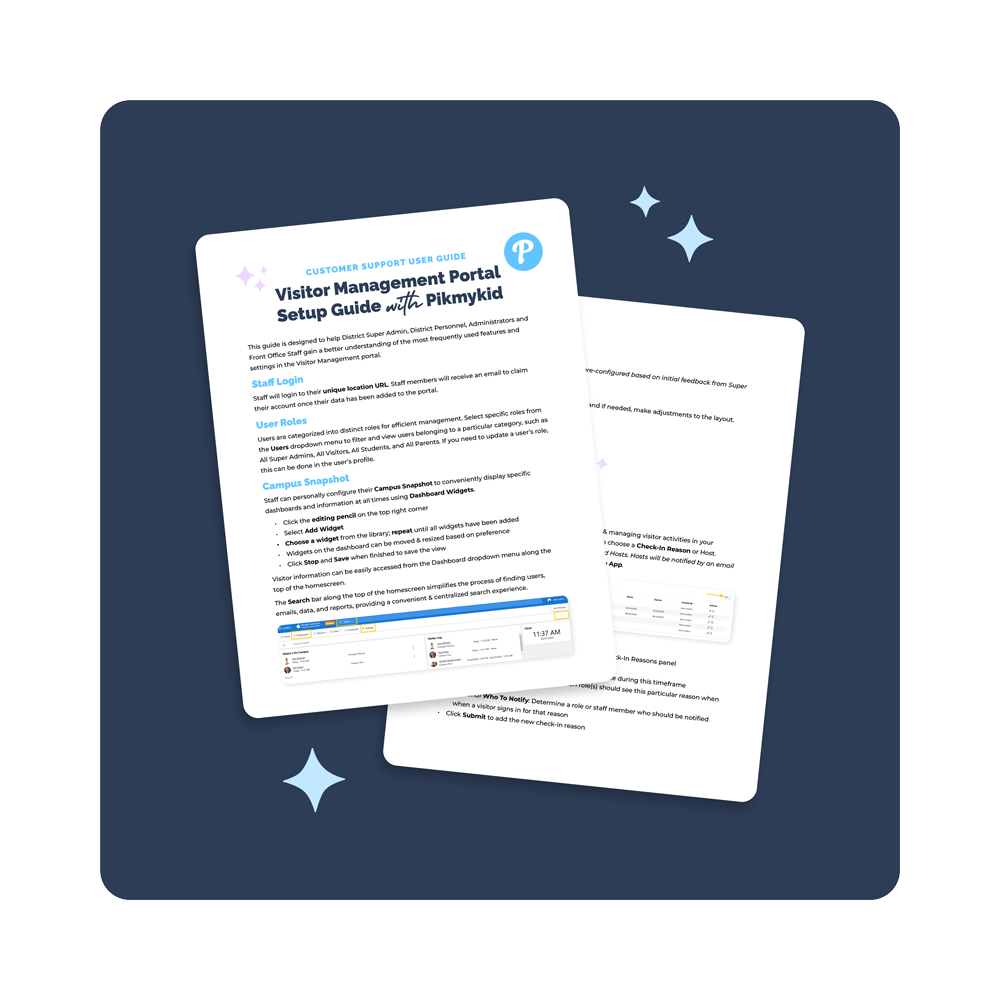
This guide is designed to help District Super Admin, District Personnel, Administrators and Front Office Staff gain a better understanding of the most frequently used features and settings in the Visitor Management portal.
Staff Login
Staff will login to their unique location URL. Staff members will receive an email to claim their account once their data has been added to the portal.
User Roles
Users are categorized into distinct roles for efficient management. Select specific roles from the Users dropdown menu to filter and view users belonging to a particular category, such as Super Admins, Visitors, etc. If you need to update a user’s role, this can be done in the user’s profile.
Campus Snapshot
Staff can personally configure their Campus Snapshot to conveniently display specific dashboards and information at all times using Dashboard Widgets.
- Click the editing pencil on the top right corner
- Select Add Widget
- Choose a widget from the library; repeat until all widgets have been added
- Widgets on the dashboard can be moved & resized based on preference
- Click Stop and Save when finished to save the view
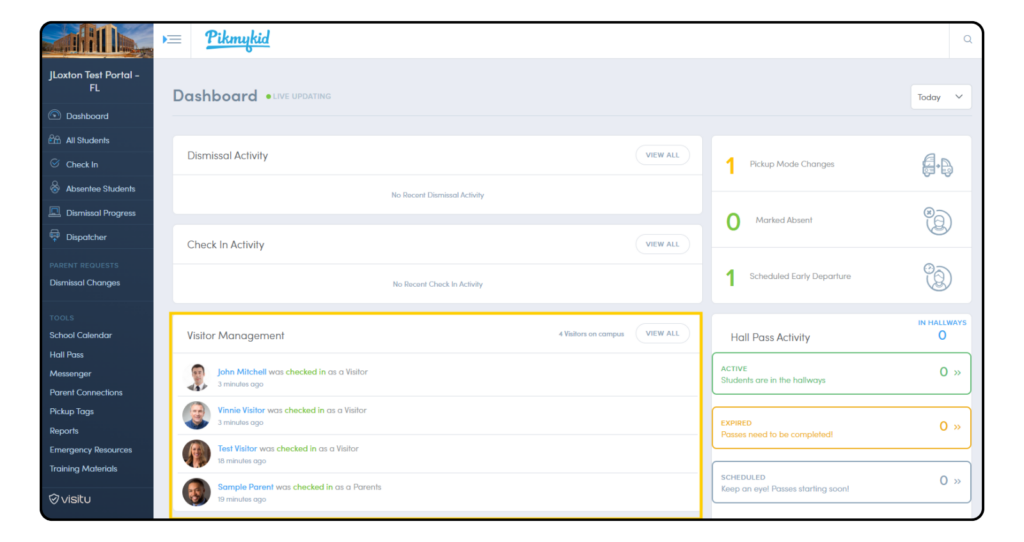
Visitor information can be easily accessed from the Dashboard dropdown menu along the top of the homescreen.
The Search bar along the top of the homescreen simplifies the process of finding users, emails, data, and reports, providing a convenient & centralized search experience.

Settings
By default, many settings have been pre-configured based on initial feedback from Super Admin users.
Badges
Here you can preview your badge setup and if needed, make adjustments to the layout.

Check-In
Visitor check-in reasons are essential for tracking & managing visitor activities in your organization. By default, all visitors will be asked to choose a Check-In Reason or Host. All staff members within the system are considered Hosts. Hosts will be notified by an email and push notification if they have the Visitu Mobile App.

Adding A New Reason
- Click the New button within the Customer Visitor Check-In Reasons panel
- Enter the new reason name in the provided field
- Optional Start/End Date Reason will only populate during this timeframe
- Optional Limit To Roles Identify which role(s) should see this particular reason when signing in
- Optional Who To Notify Determine a role or staff member who should be notified when a visitor signs in for that reason
- Click Submit to add the new check-in reason

* Please Note that deleting a check-in reason will remove all historical data related to the check-in reason. If a check-in reason must be deleted, it is highly recommended to download a report with this information prior to deleting the check-in reason.
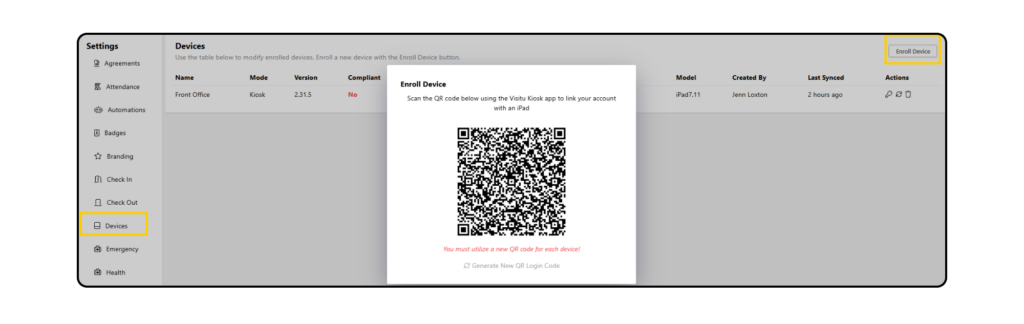
Devices
To connect your iPad(s) for Kiosk use, begin by downloading the Visitu Kiosk App to the iPad. Then click on Enroll Devices and scan the QR code using the Kiosk App on the iPad and follow the instructions.
Watch List
Add names for visitors who should be flagged when entering campus outside of your offender list. This could be used for VIPs like the Superintendent or Top Tier Donor bus also for someone who should not be on campus for a particular reason.
To add a name to the Watch List, click Add New and add all known information. Notes can be added for staff to view and certain staff or roles can be notified when the visitor signs into campus.
If you check the Require Verification box, the visitor must be approved within the Dashboard in order to check-in and receive a badge.

Reports
By default, standard reports are available and can be accessed by hovering over Reports and selecting View All.
Frequently used reports can be pinned for quick access from the Reports dropdown on the portal homepage. To save time, users can schedule reports to be sent via email to themselves or another staff member at a designated day and time.
From the Reports dashboard, users can also create custom reports.
- Click the Create New button in the top right-hand corner of the Reports page in the Dashboard
- Create a custom Name for the report
- Choose the Report Type from either the Visits or Attendance sub-categories
- Select a specified or custom Date Range
- You can also choose to add a filter for more specific information needed by clicking on Add Filter
- After choosing the filter type, specify further by choosing the role, the reason for visit, or host and click Add
- Click Save and you’ll see a notification in the dashboard that the report has been saved
- You can then preview, download, schedule, or delete the report as needed

Create A Single Sign-On With Visitu & Pikmykid
School users who need to access both the Visitu & Pikmykid portals can enable a single sign-on through the Visitu portal, allowing users to toggle between the two platforms as needed.
With the SSO, the Visitors on Campus dashboard is conveniently accessible directly from the Pikmykid portal, maintaining visibility for daily operations.
Getting Started
- Log into the Visitu Portal.
- Click on school name dropdown on top left of screen. Select Validate Email Address.

- Confirm Email using the Validation Code (will be sent to email associated with your Visitu Account).

- Click on school name dropdown again & choose Open Pikmykid Portal.

- To access Visitu form the Pikmykid Portal, select the Visitu icon on the bottom left.
